
Email is involved as evidence in nearly every legal case. In 2019, it's actually really hard to imagine a case where email wouldn't have some bearing on the outcome. Even "avid off-the-gridders" has a website, and monkeys are taking selfies! Nearly everyone leaves a digital footprint, and you can bet that selfie-takers and website owners also have email accounts! So, I think it's pretty safe to say that all of your clients use email and that in every case, some of that email is going to be discoverable and relevant. This means email needs to be preserved and collected. Fortunately, there's a way to do it that's rather easy and very free!

Assuming that your client has a webmail account with a provider such as Gmail, Yahoo, Hotmail, AOL, or iCloud, it's relatively easy to collect a copy of the account data using a trick with Microsoft Outlook. A few notes before we start, though:
- Check first for built-in export capabilities from the email provider. Gmail, for example, has a feature that lets you export all data in the account in a few clicks. It would be foolish to use Outlook when there's a built-in tool for doing the same thing.
- Test first. I recommend testing with a fake account before you collect your client's data. For example, if your client has an account @randoemail.com, create myfaketestaccount@randoemail.com, send it a few emails, and run a test collection.
- Check your skill level. If these steps sound way above your tech skill level, you may want to hire a tech guru of some kind. I can't provide any guarantees on the outcome you'll get with these steps.
Now that we've covered these caveats, let's roll up our sleeves and get into the details of an Outlook-based collection!
Preparing Outlook
First, you'll need to get Outlook ready. If you're a Mac user, you're going to need a way to run Windows: Outlook for Mac won't let you export data to a PST file and also requires you to consent to syncing your data with Microsoft Cloud. To get around this issue, I run Windows using a virtual machine (Parallels) on my Mac.
If you don't have an account set up for yourself in Outlook, you should create a dummy account. This is necessary because if you don't have an account, then Outlook won't let you remove the account (or accounts) you create for your client. (This is a recent, and somewhat irritating, change to the way that Outlook works.)
If possible, I recommend having only a dummy account in the Outlook app that you'll be using to import data. It's never a good idea to have your personal data mingled in any way with client data, even if Outlook generally does a good job of keeping the data apart.
Connecting Outlook to your client's account
It's best to schedule a time with your client to go through the next set of steps. While you can get your client's username and password in advance, those two items are rarely sufficient to web services these days. Many apps and services use techniques such as two-factor authentication, app-specific passwords, or IP address tracking, any of which will block you from authenticating without your client's assistance in real time. Do a Google search in advance to figure out which safeguards are used by the mail provider your client uses. If IP address tracking or two-factor authentication are in place, you'll simply need to have your client on the phone or with you to have them send you the code or approve your activity.
If their service requires app-specific passwords, a Google search will show you how to generate a password. It's often easiest for you to log into the email service yourself to generate the password.
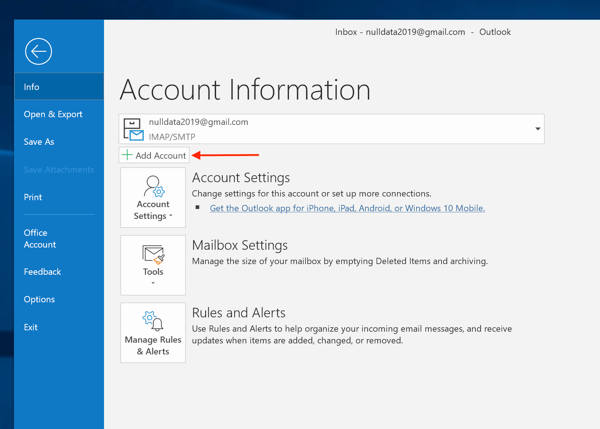
Now that you've planned how you will authenticate, you can connect the account. Visit the file tab in Outlook and click Add Account:
The account set up is much more automated in the latest version of Outlook, but I still prefer to click the box to set up the account manually, in case Outlook's automatic setup doesn't work. If everything goes well, you'll reach a final screen that says, "Account successfully added." When you're on that page, be sure to uncheck the box that reads "Set up Outlook Mobile on my phone, too." It's checked by default. Now click the big button to "Send/Receive All Folders." Depending on the amount of data in the account, this could take from a few minutes to a few days. Outlook does a terrible job estimating how long it will take, though. It estimated that it would only take 55 seconds to sync my G Suite account with nearly 20 GB of emails in it! Even if the Send/Receive progress bar on the bottom of Outlook completes, it's always worth hitting the Send/Receive button again to be sure there are no remaining emails.
Outlook's test message
In the last few Outlook-based collections I've done, I've noticed that Microsoft sends a "test" message to the account when it's being set up in Outlook. I don't have any problem with this and I simply leave this message in place. It's a handy form of automatic logging that shows exactly when you set up the account in Outlook.
Exporting to PST and removing the account in Outlook
Once sync is completed, the final steps are exporting the emails as a PST container and removing the account. Exporting to PST is helpful because it lets you dump an offline copy of the entire account, past emails and all, to a single file, which can later be added to your eDiscovery review software. Indeed, PST files are the standard form in which emails are added to eDiscovery projects, so you are on the right track when you create one.
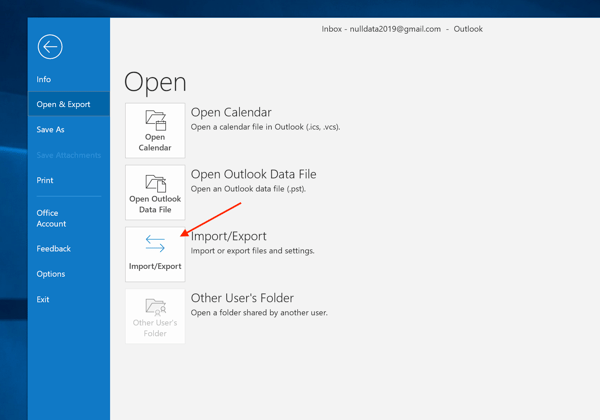
To create the export, click File > Open & Export > Import/Export:
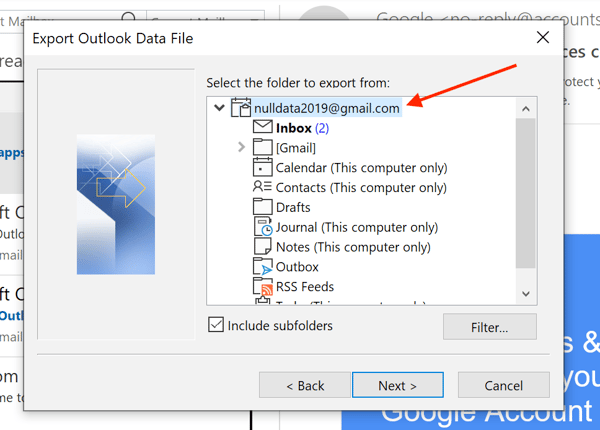
Once you're in the Import and Export Wizard, choose "Export to a file" and, on the next screen, choose "Outlook Data File (.pst)." On the next screen, choose the account, and not just one of the folders:
On the next page, you can choose how to handle duplicates. To be honest, I'm not sure what the three choices mean, so I choose what seems to be the most inclusive option: "Allow duplicate items to be created." Why not? We can always deduplicate later.
You'll also choose the location where the PST file you're about to generate will be located. I usually send the PST to my desktop and then move it to an evidence folder after it's been created. In the final step, you can set a password on the PST archive. I don't set a password at this stage. If I need to password protect the container at a later time, I will place it in an AES-256 encrypted zip file using 7-Zip.
Wrapping up
If you've made it this far: congratulations! This process is not easy, but it works pretty well, and can save your client a boatload of money. If you've had any experiences using Outlook to collect emails, good or bad, leave a comment below.